2020年12月1日火曜日

必要なのはブラウザだけ。数クリックで TOPPERS カーネル入門環境を構築する。

ブラウザからページを開いて数クリックで TOPPERS カーネルの入門環境を構築できるサイトを作ったので紹介。

Eclipse Che の Factory 機能を使って、 che.openshift.io 上に TOPPERS カーネルのビルド・実行環境を構築する。

本記事は、 TOPPERS Advent Calendar 2020 1 日目の記事です。

前提

  • 使用ブラウザ: Google Chrome 87.0.4280.66
  • che.openshift.io へのサインインが必要

手順概要

  1. https://mikoto2000.github.io/che-external-registry/ にアクセス
  2. 実行したい TOPPERS カーネルをクリック
  3. che.openshift.io にログイン
  4. Eclipse Che のワークスペースが開くので、サンプルプロジェクトの作成・ビルド・実行を行う

TOPPERS/ASP3(zybo_z7) の実行方法

例として、 TOPPERS/ASP3(zybo_z7) の実行手順を説明する。

https://mikoto2000.github.io/che-external-registry/ にアクセス

アクセスすると、以下のページが表示される。

実行したい TOPPERS カーネルをクリック

toppers-asp3 をクリック。

※ Eclipse Che に渡す devfile を確認したい場合は、右側の歯車マーク( ) をクリックすると、内容が参照できる

che.openshift.io にログイン

Red Hat アカウントでログインする。

アカウントを持っていない場合には、 今すぐ作成しましょう のリンクから Red Hat アカウントを作成するか、下部のアイコンをクリックし、 OAuth 認証でログインする。

ログインすると、以下のようにワークスペースの作成が始まる。

ワークスペースのローディング画面になる。サードパティの Cookie を有効にしないと、このまま全く進まないため、有効にする。 (シークレットモードで起動していない場合、必要のない作業だと思われる。)

Eclipse Che のワークスペースが開くので、サンプルプロジェクトの作成・ビルド・実行を行う

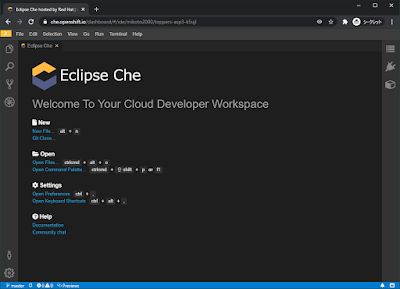
以下のように、ワークスペースが開くので、ここからサンプルプロジェクトの作成・ビルド・実行を行っていく。

左側の Explorer アイコンをクリックすると、プロジェクト内のファイル一覧が表示される。

右側の workspace アイコンをクリックすると、ワークスペースの情報が表示される。

サンプルプロジェクトの作成

右側のワークスペースのリストから、 toppers-kernel-build-kit > create sample をクリックする。

サンプルプロジェクト用のディレクトリが生成される。

ビルド

右側のワークスペースのリストから、 toppers-kernel-build-kit > build sample をクリックする。

サンプルプロジェクトがビルドされ、実行ファイル asp が生成される。

実行

右側のワークスペースのリストから、 qemu-xilinx > run sample on qemu をクリックする。

qemu-sytem-aarch64 を利用して、ビルドした asp を実行する。

サンプルの修正

toppers-asp3/sample/sample1.c がサンプルのソースコードなので、これを修正して挙動がどう変わるかを確認できる。

その他 Tips

サンプル以外のプロジェクトを追加したい場合

以下ドキュメントを参照して、ワークスペースにプロジェクトを追加できる。

Creating a workspace by importing the source code of a project :: Eclipse Che Documentation

サンプル生成・ビルド・実行のコマンドが知りたい場合

メニューの Terminal -> Configure Tasks... -> build sample を選択すると、タスク定義ファイル( tasks.json ) が開くので、そこでコマンドを確認できる。

参考資料

textlint と prh, RedPen で日本語文章をチェックする

前提

  • OS: Windows 10 Pro
  • Docker: Docker version 19.03.13, build 4484c46d9d
  • 使用する Docker イメージ
    • node:15
    • openjdk:8

チェック対象テキストは content.md。内容は以下。

Eclipse  Che のワークスペースの生成・破棄は、Linux コンテナ技術によって実現されている。そのため、ワークスペースで使用するツールは、64bit Linux 環境で動作する必要がある。TOPPERS で公開されているコンフィギュレータ(https://toppers.jp/cfg.html)は、64bit Linux環境に対応していないため、今回はTOPPERS/cfg に64bit Linux 対応の修正を行い、それを利用した(mikoto2000/cfg-1v1.9.7.2)。

textlint で日本語チェック

以下のプラグインを使ってチェックを行う。

Docker コンテナ起動

docker run -it -v "$(pwd):/work" --workdir "/work" node:15 bash

環境構築

npm install -g textlint
npm install -g @textlint/textlint-plugin-markdown

npm install -g prh
npm install -g textlint-rule-prh
npm install -g textlint-rule-preset-ja-technical-writing
npm install -g textlint-rule-preset-jtf-style

設定ファイル作成

重複など気にせず、とにかく何でもかんでも指摘させる設定になっている(はず)なので、要調整。

設定内容の詳細は各プラグインのドキュメントを参照。

最低でも ./rules/media/techbooster.yml, ./rules/media/WEB+DB_PRESS.yml はどちらかひとつにするのが良いはず。

# prh のリファレンス(?)ルール取得
git clone --depth 1 https://github.com/prh/rules.git

# prh の設定
cat - << EOF > ./prh.yml
version: 1

imports:
  - ./rules/media/techbooster.yml
  - ./rules/media/WEB+DB_PRESS.yml
EOF

# textlint の設定
cat - << EOF > ./.textlintrc
{
    "plugins": {
        "@textlint/markdown": {
            "extensions": [".md"]
        }
    },
    "rules": {
        "prh": {
            "rulePaths" :["./prh.yml"]
        },
        "preset-ja-technical-writing": true
    }
}
EOF

textlint 実行

textlint --no-color "content.md" -o lint_results.txt

lint_results.txt に、指摘点が列挙される。


/work/content.md
  1:101  error    Line 1 sentence length(151) exceeds the maximum sentence length of 100.
Over 51 characters   ja-technical-writing/sentence-length
  1:225  ✓ error  (mikoto2000/cfg-1v1.9.7.2) => (mikoto2000/cfg-1v1.9.7.2)
半角カッコの代わりに全角カッコを使うこと。文字のバランスが崩れるためです  prh

✖ 2 problems (2 errors, 0 warnings)
✓ 1 fixable problem.
Try to run: $ textlint --fix [file]

RedPen

Docker コンテナ起動

docker run -it --rm -v "$(pwd):/work" --workdir "/work" openjdk:8 bash

環境構築

curl -L -O https://github.com/redpen-cc/redpen/releases/download/redpen-1.10.4/redpen-1.10.4.tar.gz
tar xf redpen-1.10.4.tar.gz
export PATH=$PATH:$(pwd)/redpen-distribution-1.10.4/bin/

redpen 実行

redpen -f markdown -L ja ./content.md > redpen_results.txt

redpen_results.txt に、指摘が列挙される。

./content.md:1: ValidationError[SentenceLength], 文長("151")が最大値 "100" を超えています。 at line: TOPPERS で公開されているコンフィギュレータ(https://toppers.jp/cfg.html)は、64bit Linux環境に対応していないため、今回はTOPPERS/cfg に64bit Linux 対応の修正を行い、それを利用した(mikoto2000/cfg-1v1.9.7.2)。
./content.md:1: ValidationError[JapaneseAmbiguousNounConjunction], 助詞「の」が連続しています: "〜Eclipseのワークスペースの生成〜" at line: Eclipse Che のワークスペースの生成・破棄は、Linux コンテナ技術によって実現されている。
./content.md:1: ValidationError[InvalidSymbol], 不正なシンボル "(" がみつかりました。 at line: TOPPERS で公開されているコンフィギュレータ(https://toppers.jp/cfg.html)は、64bit Linux環境に対応していないため、今回はTOPPERS/cfg に64bit Linux 対応の修正を行い、それを利用した(mikoto2000/cfg-1v1.9.7.2)。
./content.md:1: ValidationError[InvalidSymbol], 不正なシンボル ")" がみつかりました。 at line: TOPPERS で公開されているコンフィギュレータ(https://toppers.jp/cfg.html)は、64bit Linux環境に対応していないため、今回はTOPPERS/cfg に64bit Linux 対応の修正を行い、それを利用した(mikoto2000/cfg-1v1.9.7.2)。
./content.md:1: ValidationError[SpaceBetweenAlphabeticalWord], アルファベット単語の後にスペースが存在しません。 at line: TOPPERS で公開されているコンフィギュレータ(https://toppers.jp/cfg.html)は、64bit Linux環境に対応していないため、今回はTOPPERS/cfg に64bit Linux 対応の修正を行い、それを利用した(mikoto2000/cfg-1v1.9.7.2)。
./content.md:1: ValidationError[SpaceBetweenAlphabeticalWord], アルファベット単語の前にスペースが存在しません。 at line: TOPPERS で公開されているコンフィギュレータ(https://toppers.jp/cfg.html)は、64bit Linux環境に対応していないため、今回はTOPPERS/cfg に64bit Linux 対応の修正を行い、それを利用した(mikoto2000/cfg-1v1.9.7.2)。

後は、それぞれの Docker イメージを作ってサクッと実行できるようにしたうえで、設定を詰めていけばいい感じになりそう。

以上。

参考資料

2020年11月12日木曜日

Debian に H2 データベースをインストールして Web コンソールから SQL を発行する

前提

  • OS: Windows 10 Pro
  • Docker: Docker version 19.03.13, build 4484c46d9d
  • 使用イメージ: debian:buster-slim

Docker コンテナ起動

docker run -it --rm -p "8082:8082" debian:buster-slim

インストール

# 必要なツール群インストール
mkdir -p /usr/share/man/man1
apt-get update
apt-get install -y curl unzip openjdk-11-jdk-headless

# ファイル一式をダウンロードして /opt/h2 へ配置する
curl -l -O https://h2database.com/h2-2019-10-14.zip
unzip h2-2019-10-14.zip
mv h2 /opt/
chmod u+x /opt/h2/bin/h2.sh
rm -rf h2-2019-10-14.zip

# パスを通す
export PATH=$PATH:/opt/h2/bin

データベース作成

データベースファイルは org.h2.tools.Shell の初回接続時に自動生成されるので、とりあえず空の SQL を発行する。

java -cp /opt/h2/bin/h2-1.4.200.jar org.h2.tools.Shell -url jdbc:h2:~/h2db_data -driver org.h2.Driver -user sa -password "" -sql ""

サーバー起動

web コンソールを有効化してサーバーを起動する。

/opt/h2/bin/h2.sh -webAllowOthers

Web コンソールで接続

ここまで来たら、ホストのブラウザで http://localhost:8082 に接続する。

Web コンソールが開くので、各項目に以下の通り入力し、 接続 ボタンを押下。

  • ドライバクラス: org.h2.Driver
  • JDBC URL: jdbc:h2:~/h2db_data
  • ユーザ名: sa
  • パスワード: (空)

h2db_data は、 データベース作成 で作成したデータベース名。

あとはテキストエリアに SQL 入れて実行するだけ。

以上。

参考資料

2020年11月1日日曜日

Coffee Editor のサンプルプロジェクトを動かす

必須環境を構築したら、あとは run.sh が全部よしなにやってくれる。らくちん。

前提

  • OS: Windows 10 Pro
  • docker: Docker version 19.03.8, build afacb8b
  • 使用イメージ: debian:buster-slim

作業用コンテナ起動

docker run -it --rm -v "$(pwd):/work" -v "$HOME/.m2:/root/.m2" --workdir="/work" -p "3000:3000" debian:buster-slim

環境構築

ビルドに必要な環境を構築

apt-get update

# Theia のビルド・実行に必要なものをインストール
mkdir -p /usr/share/man/man1
apt-get install -y openjdk-11-jdk-headless curl git maven python

# nodejs native addon ビルドに必要なものをインストール
apt-get install -y make g++ libsecret-1-dev xvfb libx11-dev libxkbfile-dev libxml2-utils

# nodejs, yarn, node-gyp のインストール
curl -o- https://raw.githubusercontent.com/creationix/nvm/v0.33.5/install.sh | bash
export NVM_DIR="$HOME/.nvm"
[ -s "$NVM_DIR/nvm.sh" ] && \. "$NVM_DIR/nvm.sh"
[ -s "$NVM_DIR/bash_completion" ] && \. "$NVM_DIR/bash_completion"
nvm install 10
nvm use 10
npm install -g yarn

ビルド・実行

ソースコード取得

cd /work
git clone https://github.com/eclipsesource/coffee-editor.git

ビルド・実行

cd /work/coffee-editor
./run.sh

firefox の起動に失敗するが、しばらく待っていると coffee-editor のフロントエンドが立ち上がる。

以上。

追記

ログをよく見るとエラーが発生しまくっていた。リベンジする。

参考資料

更新履歴

日付 更新内容
2020/11/1 新規作成
2020/11/2 裏でエラーが発生していたことを追記

2020年10月22日木曜日

Eclipse Sirius Web のサンプルプロジェクトを試す

Eclipse Sirius の クラウドベーススタックである Sirius Web, それのサンプルを動かした。

基本的には sirius-web/README.adoc の手順通り。

各コンポーネントの同期がとれていないのか、手順そのままでは動かなかったので、いくつか詰まった点を追記している。

前提

  • OS: Windows 10 Pro
  • Docker: Docker version 19.03.13, build 4484c46d9d
  • 使用イメージ: debian:buster-slim

GitHub Package Registry 向けのパーソナルアクセストークンを生成する

  1. Settings -> Developer settings -> Personal access tokens -> Generate new token
  2. New personal access token で必要事項入力
    • Note : read package registry
    • repo にチェックを入れる
    • read:packages にチェックを入れる
    • Generate token キー押下
  3. 表示されたアクセストークンをメモ

ビルド用コンテナ起動

最終的に、このコンテナで生成した jar ファイルを Windows 上で動かす。(ので、ポート指定は無し)

docker run -it --rm --name sirius-web -v "$(pwd):/work" -v "$HOME/.m2:/root/.m2" --workdir="/work" debian:buster-slim

作業用コンテナ内で環境構築

ビルドに必須な環境を構築

Java11, Maven, curl, git, nodejs, yalc, rollup が必要。

apt-get update
mkdir -p /usr/share/man/man1
apt-get install -y openjdk-11-jdk-headless curl git maven

# nodejs インストール
curl -sL https://deb.nodesource.com/setup_15.x | bash -
apt-get install -y nodejs

# rollup, yalc インストール
npm install -g rollup yalc

# npm 自身のアップグレード
npm install -g npm

ソース取得・ビルド

ObeoNetwork/Flow-Designer

cd /work
git clone https://github.com/ObeoNetwork/Flow-Designer.git
cd Flow-Designer
mvn clean install

ビルド済みのものが以下 issue にぶら下がっているが、それに気付く前にビルドしてしまった。

See: https://github.com/eclipse-sirius/sirius-web/blob/d4955a228200b22d78b9c37e45101efda03b976b/backend/sirius-web-sample-application/pom.xml#L44

eclipse-sirius/sirius-emf-json

# sirius-emf-json の取得・ビルド・インストール
cd /work
git clone https://github.com/eclipse-sirius/sirius-emf-json.git
cd sirius-emf-json
mvn clean install -f releng/org.eclipse.sirius.emfjson.releng/pom.xml

eclipse-sirius/sirius-components

# sirius-components の取得
cd /work
git clone https://github.com/eclipse-sirius/sirius-components.git

# sirius-components のフロントエンドをビルド・ローカルパブリッシュ
cd /work/sirius-components/frontend
npm install
npm run build
yalc publish

# sirius-components のバックエンドをビルド・インストール
cd /work/sirius-components/backend
mvn clean install

eclipse-sirius/sirius-web

GitHub の npm registry へのログイン設定

フロントエンドで GitHub の NPM パッケージレジストリを使用しているのでその設定。

echo '//npm.pkg.github.com/:_authToken=TOKEN' > ~/.npmrc
  • TOKEN: パーソナルアクセストークン

GitHub の Maven registry へのログイン設定

バックエンドで GitHub の Maven パッケージレジストリを使用しているのでその設定。

export USERNAME=mikoto2000
export PASSWORD=TOKEN
  • TOKEN: パーソナルアクセストークン

eclipse-sirius/sirius-web のソース取得・ビルド

cd /work
git clone https://github.com/eclipse-sirius/sirius-web.git

# フロントエンド
cd /work/sirius-web/frontend

# npm registry の obeo/sirius-components を削除して、
# ローカルの eclipse-sirius/sirius-components を追加
# See: https://github.com/eclipse-sirius/sirius-web/issues/1#issuecomment-712639686
sed -i -e 's/    "@obeo\/sirius-components": "0.1.27",//' ./package.json
yalc add @eclipse-sirius/sirius-components

# それにともなって、 import している箇所も修正
sed -i -e 's/obeo\/sirius-components/eclipse-sirius\/sirius-components/' ./src/index.js
sed -i -e 's/obeo\/sirius-components/eclipse-sirius\/sirius-components/' ./src/main/Main.js
npm install
npm run build

# バックエンド
cd /work/sirius-web
mkdir -p backend/sirius-web-frontend/src/main/resources/static
cp -R frontend/build/* backend/sirius-web-frontend/src/main/resources/static
cd /work/sirius-web/backend
mvn -s /work/sirius-web/settings.xml clean package

サンプルアプリケーションの実行

ビルドの時点で必要なものは jar の中に全部入ったから、これ以降は Windows 上での作業。

# sirius web 用の PostgreSQL サーバー起動
# See: https://github.com/eclipse-sirius/sirius-web/blob/master/scripts/restart-siriusweb-postgresql.sh
docker run -p 5433:5432 --rm --name sirius-web-postgres -e POSTGRES_USER=dbuser -e POSTGRES_PASSWORD=dbpwd -e POSTGRES_DB=sirius-web-db -d postgres

# Sirius Web サンプルアプリケーション起動
java -jar sirius-web/backend/sirius-web-sample-application/target/sirius-web-sample-application-0.0.1-SNAPSHOT.jar --spring.profiles.active=dev --spring.datasource.url=jdbc:postgresql://localhost:5433/sirius-web-db --spring.datasource.username=dbuser --spring.datasource.password=dbpwd

http://localhost:8080 へアクセスすると、 Sirius Web の画面が表示される。

参考資料

2020年10月5日月曜日

Sprint Boot で Jackson を使う

試していきます。

前提

  • OS: Windows 10 Pro
  • Docker: Docker version 19.03.13, build 4484c46d9d
    • 使用イメージ: mikoto2000/openjdk:15
  • Java: openjdk 15 2020-09-15

プロジェクト作成

Spring Initializr で作成。

ここ を参照。

依存関係追加

pom.xml に Jackson の依存関係を追加。

        <!-- https://mvnrepository.com/artifact/com.fasterxml.jackson.core/jackson-databind -->
        <dependency>
            <groupId>com.fasterxml.jackson.core</groupId>
            <artifactId>jackson-databind</artifactId>
            <version>2.11.3</version>
        </dependency>

処理実装

まず、 JacksonApplication.java 全体を載せる。

package dev.mikoto2000.study.jackson;

import com.fasterxml.jackson.core.JsonProcessingException;
import com.fasterxml.jackson.databind.ObjectMapper;

import org.springframework.beans.factory.annotation.Autowired;
import org.springframework.boot.SpringApplication;
import org.springframework.boot.autoconfigure.SpringBootApplication;
import org.springframework.context.ConfigurableApplicationContext;
import org.springframework.context.annotation.Bean;

import lombok.Data;

@SpringBootApplication
public class JacksonApplication {

    @Autowired
    private ObjectMapper jacksonObjectMapper;

    public static void main(String[] args) throws Exception {
        ConfigurableApplicationContext context = SpringApplication.run(JacksonApplication.class, args);
        JacksonApplication app = context.getBean(JacksonApplication.class);
        app.process(args);
    }

    public void process(String... args) throws JsonProcessingException {

        String userStringOrig = """
                                {
                                    "id": 0,
                                    "name": "mikoto2000"
                                }
                                """;

        // JSON 文字列からオブジェクトへの変換
        User user = jacksonObjectMapper.readValue(userStringOrig, User.class);
        System.out.println(user);

        // オブジェクトから JSON 文字列への変換
        String userString = jacksonObjectMapper.writeValueAsString(user);
        System.out.println(userString);

    }

    @Bean
    public ObjectMapper mapper() {
        return new ObjectMapper();
    }

}

@Data
class User {
    Long id;
    String name;
}

ObjectMapper の設定

JacksonApplication クラスに、以下修正を行う。

@Autowired できるように(?)、 ObjectMapper を返却する mapper メソッドを追加。

    @Bean
    public ObjectMapper mapper() {
        return new ObjectMapper();
    }

@Autowired で Jackson の ObjectMapper クラスをマッピング。

    @Autowired
    private ObjectMapper jacksonObjectMapper;

変換主処理

readValue, writeValueAsString を使って、オブジェクトと JSON 文字列の変換を行う。

    public void process(String... args) throws JsonProcessingException {

        String userStringOrig = """
                                {
                                    "id": 0,
                                    "name": "mikoto2000"
                                }
                                """;

        // JSON 文字列からオブジェクトへの変換
        User user = jacksonObjectMapper.readValue(userStringOrig, User.class);
        System.out.println(user);

        // オブジェクトから JSON 文字列への変換
        String userString = jacksonObjectMapper.writeValueAsString(user);
        System.out.println(userString);

    }

ログ出力設定

src/main/resources/application.yaml

spring:
  main:
    banner-mode: off

src/main/resources/logback.xml

<?xml version="1.0" encoding="UTF-8" ?>
<configuration>
    <appender name="CONSOLE_APPENDER" class="ch.qos.logback.core.ConsoleAppender">
        <encoder>
            <pattern>%d %-5level [%thread] %logger{0}: %msg%n</pattern>
        </encoder>
    </appender>
    <root level="ERROR">
        <appender-ref ref="CONSOLE_APPENDER"/>
    </root>
</configuration>

で、完成したものがこちら。

参考資料

Reprepro で APT リポジトリを構築する

前々回, 前回 と、deb パッケージを作ったので、これを公開する APT リポジトリを作っていく。

コンテナ起動

docker run -it --rm -v "$(pwd):/work" --workdir="/work" debian:buster-slim

APT リポジトリの構築

必須パッケージのインストール

apt-get update
apt-get install -y gnupg2 reprepro

署名用の鍵生成

鍵生成の設定ファイル作成

gpg --full-generate-key
  1. Please select what kind of key you want : `(1) RSA and RSA (default)`
  2. What keysize do you want? (3072) : 4096
  3. Please specify how long the key should be valid. : 0
  4. Is this correct? (y/N) : y
  5. Real name : mikoto2000
  6. Email address : mikoto2000@gmail.com
  7. Comment : Athrill apt repository key.
  8. Change (N)ame, (C)omment, (E)mail or (O)kay/(Q)uit? : O
  9. Passphrase : (空)

鍵の ID をメモしておく。

(今回は 6B5F3367A3F74C173E2E83612F6719AE3DEFC0C0 だった。)

リポジトリ設定

リポジトリ設定格納用ディレクトリの作成

mkdir -p /work/reprepro/conf

リポジトリ設定作成

/work/reprepro/conf/distributions

cat <<EOF> /work/reprepro/conf/distributions
Origin: TOPPERS/hakoniwa
Label: Athrill
Codename: bionic
Architectures: amd64
Components: main
Description: Apt repository for project Athrill
SignWith: 6B5F3367A3F74C173E2E83612F6719AE3DEFC0C0
EOF
  • Codename : ディストリビューションのコードネーム。bionic だったり buster だったり
  • SignWith : gpg コマンドで作成した公開鍵の ID

パッケージの取り込み

cd /work/reprepro
reprepro includedeb bionic /work/athrill-rh850f1x_0.A.0-1_amd64.deb

署名の設定

cd /work/reprepro
gpg --armor --output athrill.gpg.key --export 6B5F3367A3F74C173E2E83612F6719AE3DEFC0C0

動作確認

Web サーバーを立ててそこからインストールしてみる。

APT リポジトリとなる nginx 起動

新しく nginx のコンテナを立てる。

先ほど作成した reprepro ディレクトリを /usr/share/nginx/html にマウントする。

docker run -it --rm -v "$(pwd)/reprepro:/usr/share/nginx/html:ro" -p "80:80" --name nginx nginx

※ 実際は、 db/, conf/ は見えないようにするらしい

正しくインストールできるか確認

先ほど立ち上げた nginx から、正しく apt でインストールできるかを確認する。

新たに debian:buster-slim のコンテナを立ち上げて、 host.docker.internal の APT リポジトリを登録する。

インストールする debian の起動

docker run -it --rm ubuntu:18.04

必要パッケージインストール

apt-get update
apt-get install -y curl gnupg2 software-properties-common

APT リポジトリのキー登録

curl -fsSL http://host.docker.internal/athrill.gpg.key | apt-key add -

APT リポジトリ登録

add-apt-repository "deb http://host.docker.internal bionic main"
apt-get update

インストール

apt-get install -y athrill-rh850f1x

鍵の管理

このままだと、コンテナ終了時に秘密鍵も消えてしまうので、コンテナからエクスポートしてコピーすること。

鍵のエクスポート

cd /
gpg --list-secret-keys
gpg --export-secret-keys --output backup.sec.key mikoto2000@gmail.com
gpg --export --output backup.pub.key mikoto2000@gmail.com

鍵のインポート

gpg --import ./backup.sec.key
gpg --import ./backup.pub.key

参考資料

2020年10月4日日曜日

Athrill2 の deb パッケージ作成を git-buildpackage で管理する

前回、 Athrill の deb パッケージ作成手順を確立したので、今回はそれを git-buildpackage で管理するための手順を確認する。

作業用コンテナ立ち上げ

cowbuilder 実行の権限を渡すために --privileged オプションを付けてコンテナ起動。

docker run -it --rm -v "$(pwd):/work" --workdir="/work" --privileged ubuntu:18.04

deb パッケージの作成に必要な環境を構築

# deb パッケージビルドに必要な環境変数を設定
export DEBFULLNAME="mikoto2000"
export DEBMAIL=mikoto2000@gmail.com
export LONGNAME="mikoto2000"
export USER="mikoto2000"

# tzdata の configuration が走るので、 Azia/Tokyo を選択して(Geographic area: 6, Time zone: 79)
export TZ=Asia/Tokyo
ln -snf /usr/share/zoneinfo/$TZ /etc/localtime && echo $TZ > /etc/timezone

# 必要なパッケージのインストール
apt-get update
apt-get install -y build-essential dh-make git-buildpackage fakeroot devscripts pbuilder cdbs git vim cowbuilder

git config --global user.name "mikoto2000"
git config --global user.email "mikoto2000@gmail.com"

deb パッケージビルドに必要なファイル群の取得・生成

# deb パッケージ用のディレクトリ作成
mkdir athrill-rh850f1x
cd athrill-rh850f1x
git init
git commit --allow-empty -m 'Initial commit.'

# オリジナルのソースコード取得
git submodule add https://github.com/toppers/athrill.git
git submodule add https://github.com/toppers/athrill-target-rh850f1x.git
git commit -m 'Added upstream sources.'

# 作業用ブランチ作成
git checkout -b add_debian_directory

# deb パッケージに必要なファイル群を生成
dh_make --createorig -s -e ${DEBMAIL} -p athrill-rh850f1x_0.A.0 -y
git add debian
git commit -m 'Added debian directory.'

# サンプルファイル類削除
rm -rf debian/*.ex
rm -rf debian/*.EX
rm -rf debian/README.*
rm -rf debian/athrill-rh850f1x-docs.docs

メタデータ編集

debian/control

Source: athrill-rh850f1x
Section: misc
Priority: optional
Maintainer: kanetugu2015 <kanetugu2015@gmail.com>
Bugs: https://github.com/toppers/athrill-target-rh850f1x
Build-Depends: cdbs, debhelper (>= 10)
Standards-Version: 4.1.2
Homepage: https://github.com/toppers/athrill-target-rh850f1x

Package: athrill-rh850f1x
Architecture: any
Depends: ${shlibs:Depends}, ${misc:Depends}
Description: Athrill emulator for RH850F1x.
 Athrill core version: 1.1.1

コピーライト修正

debian/copyright

TOPPERS ライセンスに修正。

Format: http://www.debian.org/doc/packaging-manuals/copyright-format/1.0/
Upstream-Name: athrill-terget-rh850f1x
Source: https://github.com/toppers/athrill-target-rh850f1x

Files: *
Copyright: 2019 by Center for Embedded Computing Systems
                     Graduate School of Informatics, Nagoya Univ., JAPAN
           2019 by ESM, Inc.
License: TOPPERS License
 上記著作権者は,以下の (1)〜(4) の条件を満たす場合に限り,本ソフトウェ
 ア(本ソフトウェアを改変したものを含む.以下同じ)を使用・複製・改変・
 再配布(以下,利用と呼ぶ)することを無償で許諾する.
 (1) 本ソフトウェアをソースコードの形で利用する場合には,上記の著作権
     表示,この利用条件および下記の無保証規定が,そのままの形でソース
     コード中に含まれていること.
 (2) 本ソフトウェアを,ライブラリ形式など,他のソフトウェア開発に使用
     できる形で再配布する場合には,再配布に伴うドキュメント(利用者マ
     ニュアルなど)に,上記の著作権表示,この利用条件および下記の無保
     証規定を掲載すること.
 (3) 本ソフトウェアを,機器に組み込むなど,他のソフトウェア開発に使用
     できない形で再配布する場合には,次のいずれかの条件を満たすこと.
   (a) 再配布に伴うドキュメント(利用者マニュアルなど)に,上記の著作
       権表示,この利用条件および下記の無保証規定を掲載すること.
   (b) 再配布の形態を,別に定める方法によって,TOPPERSプロジェクトに報
       告すること.
 (4) 本ソフトウェアの利用により直接的または間接的に生じるいかなる損害
     からも,上記著作権者およびTOPPERSプロジェクトを免責すること.また,
     本ソフトウェアのユーザまたはエンドユーザからのいかなる理由に基づ
     く請求からも,上記著作権者およびTOPPERSプロジェクトを免責すること.

 本ソフトウェアは,無保証で提供されているものである.上記著作権者およ
 びTOPPERSプロジェクトは,本ソフトウェアに関して,特定の使用目的に対す
 る適合性も含めて,いかなる保証も行わない.また,本ソフトウェアの利用
 により直接的または間接的に生じたいかなる損害に関しても,その責任を負
 わない.

ビルドスクリプト修正

debian/rules

#!/usr/bin/make -f
include /usr/share/cdbs/1/rules/debhelper.mk

install/athrill-rh850f1x::
    install -pd $(DEB_DESTDIR)/usr/bin
    install -pm 755 athrill/bin/linux/athrill2 $(DEB_DESTDIR)/usr/bin/athrill2-rh850f1x
    install -pd athrill-target-rh850f1x/params/rh850f1k/* $(DEB_DESTDIR)/usr/share/doc/athrill/params/rh850f1k

build/athrill-rh850f1x::
    cd athrill-target-rh850f1x/build_linux; make

バイナリファイルのホワイトリスト作成

debian/source/include-binaries

athrill/bin/linux/athrill2

changelog を修正

debian/changelog

athrill-rh850f1x (0.A.0-1) unstable; urgency=medium

  * Initial release.

 -- mikoto2000 <mikoto2000@gmail.com>  Sun, 04 Oct 2020 10:14:22 +0900

メンテナースクリプトの作成

debian/postinst

インストール後に、 update-alternativesathrill2 コマンドを登録

update-alternatives --install /usr/bin/athrill2 athrill2 /usr/bin/athrill2-rh850f1x 10

debian/prerm

アンインストール前に、 update-alternatives で登録した athrill2 設定を削除

update-alternatives --install /usr/bin/athrill2 athrill2 /usr/bin/athrill2-rh850f1x 10

修正をコミット

git add .
git commit -m 'Update debian directory for athrill.'
dpkg-source --commit

ビルド

cowbuilder でクリーンなビルド環境を作って、その中でビルド。

# ビルド環境を作る
cowbuilder --create --basepath /var/cache/pbuilder/bionic.cow --distribution bionic

# ビルド
gbp buildpackage -us -uc --git-pristine-tar-commit --git-pbuilder --git-pbuilder-options=" --basepath /var/cache/pbuilder/bionic.cow --source-only-changes" --git-tag --git-ignore-new --git-upstream-tag=add_debian_directory
  • add_debian_directory: deb パッケージを作る際の元ネタに使うブランチを指定

ビルドが実行され、以下 3 つが生成される。

  • athrill_0.A.0-1_amd64.deb
  • タグ debian/0.A.0-1
  • ブランチ pristine-tar

マージ, push

  1. add_debian_directorymaster へマージ(GitHub なら Pull Request 出したり)
  2. リモートリポジトリがあるならタグ・ブランチを push
    • debian/0.A.0-1
    • pristine-tar

この作業で作ったリポジトリが以下。

mikoto2000/athrill-target-rh850f1x-deb: athrill-target-rh850f1x deb package.

おまけ

以上。

参考資料

2020年9月25日金曜日

Athrill2 の deb パッケージを作成する

deb パッケージの作成に必要な環境を構築

# deb パッケージビルドに必要な環境変数を設定
export DEBFULLNAME="mikoto2000"
export DEBMAIL=mikoto2000@gmail.com
export LONGNAME="mikoto2000"
export USER="mikoto2000"

# 必要なパッケージのインストール
apt-get update
apt-get install -y build-essential dh-make fakeroot devscripts pbuilder cdbs git vim

deb パッケージビルドに必要なファイル群の取得・生成

# deb パッケージ用のディレクトリ作成
mkdir athrill
cd athrill

# オリジナルのソースコード取得
git clone --recurse-submodules https://github.com/toppers/athrill.git
git clone --recurse-submodules https://github.com/toppers/athrill-target-rh850f1x.git

# deb パッケージに必要なファイル群を生成
dh_make --createorig -s -e ${DEBMAIL} -p athrill_2.0.0

# サンプルファイル類削除
rm -rf debian/*.ex
rm -rf debian/*.EX

メタデータ編集

debian/control

Source: athrill
Section: misc
Priority: optional
Maintainer: kanetugu2015 <kanetugu2015@gmail.com>
Bugs: https://github.com/toppers/athrill-target-rh850f1x
Build-Depends: debhelper (>= 10)
Standards-Version: 4.1.2
Homepage: https://github.com/toppers/athrill-target-rh850f1x

Package: athrill
Architecture: any
Depends: ${shlibs:Depends}, ${misc:Depends}
Description: Athrill emulator for RH850F1x.

コピーライト修正

debian/copyright

TOPPERS ライセンスに修正。

Format:  http://www.debian.org/doc/packaging-manuals/copyright-format/1.0/
Upstream-Name: athrill
Source: https://github.com/toppers/athrill-target-rh850f1x

Files: *
Copyright: 2019 by Center for Embedded Computing Systems
                     Graduate School of Informatics, Nagoya Univ., JAPAN
           2019 by ESM, Inc.
License: TOPPERS License
 上記著作権者は,以下の (1)〜(4) の条件を満たす場合に限り,本ソフトウェ
 ア(本ソフトウェアを改変したものを含む.以下同じ)を使用・複製・改変・
 再配布(以下,利用と呼ぶ)することを無償で許諾する.
 (1) 本ソフトウェアをソースコードの形で利用する場合には,上記の著作権
     表示,この利用条件および下記の無保証規定が,そのままの形でソース
     コード中に含まれていること.
 (2) 本ソフトウェアを,ライブラリ形式など,他のソフトウェア開発に使用
     できる形で再配布する場合には,再配布に伴うドキュメント(利用者マ
     ニュアルなど)に,上記の著作権表示,この利用条件および下記の無保
     証規定を掲載すること.
 (3) 本ソフトウェアを,機器に組み込むなど,他のソフトウェア開発に使用
     できない形で再配布する場合には,次のいずれかの条件を満たすこと.
   (a) 再配布に伴うドキュメント(利用者マニュアルなど)に,上記の著作
       権表示,この利用条件および下記の無保証規定を掲載すること.
   (b) 再配布の形態を,別に定める方法によって,TOPPERSプロジェクトに報
       告すること.
 (4) 本ソフトウェアの利用により直接的または間接的に生じるいかなる損害
     からも,上記著作権者およびTOPPERSプロジェクトを免責すること.また,
     本ソフトウェアのユーザまたはエンドユーザからのいかなる理由に基づ
     く請求からも,上記著作権者およびTOPPERSプロジェクトを免責すること.

 本ソフトウェアは,無保証で提供されているものである.上記著作権者およ
 びTOPPERSプロジェクトは,本ソフトウェアに関して,特定の使用目的に対す
 る適合性も含めて,いかなる保証も行わない.また,本ソフトウェアの利用
 により直接的または間接的に生じたいかなる損害に関しても,その責任を負
 わない.

ビルドスクリプト修正

debian/rules

#!/usr/bin/make -f
include /usr/share/cdbs/1/rules/debhelper.mk
 
install/athrill::
    install -pd $(DEB_DESTDIR)/usr/bin
    install -pm 755 athrill/bin/linux/* $(DEB_DESTDIR)/usr/bin

build/athrill::
    cd athrill-target-rh850f1x/build_linux; make

コミット・ビルド

# 初回は必要ない(`dpkg-source: info: there are no local changes to record` になるはず)
dpkg-source --commit

# ビルド・もろもろの成果物生成
debuild -rfakeroot -uc -us

ビルドが実行され、 athrill_2.0.0-1_amd64.deb が生成される。

成果物の確認

./
 +- athrill/                          : deb パッケージ用ディレクトリ
 |   +- athrill/                      : clone した athrill リポジトリ
 |   +- athrill-target-rh850f1x/      : clone した athrill-target-rh850f1x リポジトリ
 |   +- debian/                       : deb パッケージに必要な情報を入れたディレクトリ
 +- athrill_2.0.0-1.debian.tar.xz     : debian ディレクトリの中身を圧縮したもの
 +- athrill_2.0.0-1_amd64.build       : ビルドログ
 +- athrill_2.0.0-1_amd64.changes     : 変更履歴
 +- athrill_2.0.0.orig.tar.xz         : オリジナルソースコードを圧縮したもの
 +- athrill-dbgsym_2.0.0-1_amd64.ddeb : デバッグシンボルパッケージ
 +- athrill_2.0.0-1.dsc               : ソースコードの概要が記述されたファイル
 +- athrill_2.0.0-1_amd64.buildinfo   : ビルド時の環境情報
 +- athrill_2.0.0-1_amd64.deb         : apt, dpkg でインストールできるバイナリパッケージ

あとは、生成された athrill_2.0.0-1_amd64.deb を配布すれば OK。

一般的には、これを git-buildpackage で管理するらしいので、その方法を勉強しないと…

以上。

参考資料

2020年9月14日月曜日

Docker で MQTT -> Fluentd -> MySQL する

やること

+-----------------------+  +-------------------+  +-------------------------+  +-------+
| HiveMQ                |->| EMQ X             |->| Fluentd                 |->| MySQL |
| (MQTT パブリッシャー) |  | (MQTT ブローカー) |  | (MQTT サブスクライバー) |  |       |
+-----------------------+  +-------------------+  +-------------------------+  +-------+

前提

とりあえず動かす

MySQL

テーブル定義を作って ./docker-entrypoint-initdb.d にマウント

設定ファイル作成

mkdir -p ./conf/mysql/initdb.d

./conf/mysql/initdb.d/Message.sql

DROP SCHEMA IF EXISTS demo;
CREATE SCHEMA demo;
USE demo;

DROP TABLE IF EXISTS message;

CREATE TABLE message
(
  id           INT(10),
  node_name    VARCHAR(40),
  user_name    VARCHAR(40),
  message      VARCHAR(40)
);

起動

docker run -it --rm --name mysql -e "MYSQL_ROOT_PASSWORD=password" -p "3306:3306" -v "$(pwd)/conf/mysql/initdb.d:/docker-entrypoint-initdb.d" mysql:8.0.21 --default-authentication-plugin=mysql_native_password

EMQ X

docker run で立ち上げるだけ。

docker run -it --rm --name emqx -p 1883:1883 -p 8083:8083 emqx/emqx:4.2.0
  • 1883: MQTT TCP port
  • 8083: MQTT WS port

Fluentd

  1. 使用するプラグインをインストールした Docker イメージを作成
  2. プラグイン定義を作って /fluentd/etc/fluent.conf にマウント

Dockerfile を作成

mkdir dockerfile/fluentd

./dockerfile/fluend/Dockerfile

FROM fluent/fluentd:v1.11.2-1.0

LABEL maintainer "mikoto2000 <mikoto2000@gmail.com>"
LABEL version="1.0.0"
LABEL description "fluentd v1.11.2-1.0, fluent-plugin-mqtt, fluent-plugin-mysql."

USER root

RUN apk add alpine-sdk ruby-dev mariadb-dev

RUN fluent-gem install fluent-plugin-mqtt-io fluent-plugin-mysql

USER fluent

fluentd 設定ファイルを作成

mkdir -p ./conf/fluentd/td-agent

./conf/fluentd/td-agent/td-agent.conf

<source>
  @type mqtt
  host host.docker.internal
  port 1883
  topic test/#
  <parse>
    @type json
  </parse>
</source>

<filter test.**>
  @type record_transformer
  <record>
    node_name ${tag_parts[1]}
  </record>
</filter>

<match test.one>
  @type mysql_bulk
  host host.docker.internal
  port 3306
  database demo
  username root
  password password
  column_names id,node_name,user_name,message
  table message
  flush_interval 10s
</match>

イメージビルド

docker build -t mikoto2000/fluentd:mqtt-mysql ./dockerfile/fluentd

起動

docker run -it --rm --name fluentd -v "$(pwd)/conf/fluentd/td-agent/td-agent.conf:/fluentd/etc/fluent.conf" mikoto2000/fluentd:mqtt-mysql

接続確認

Topic を Publish

  1. http://www.hivemq.com/demos/websocket-client に接続
  2. Connection を設定し、 Connect ボタン押下
    • Host: localhost
    • Port: 8083
  3. Publish を設定し、 Publish ボタン押下
    • Topic: test/one
    • Message: {"id":1, "user_name": "test", "message":"testing"}

MySQL テーブル確認

docker execmysql コンテナに接続してテーブルを確認。

> docker exec -it mysql mysql -p
Enter password:
Welcome to the MySQL monitor.  Commands end with ; or \g.
Your MySQL connection id is 11
Server version: 8.0.21 MySQL Community Server - GPL

Copyright (c) 2000, 2020, Oracle and/or its affiliates. All rights reserved.

Oracle is a registered trademark of Oracle Corporation and/or its
affiliates. Other names may be trademarks of their respective
owners.

Type 'help;' or '\h' for help. Type '\c' to clear the current input statement.

mysql> use demo;
Reading table information for completion of table and column names
You can turn off this feature to get a quicker startup with -A

Database changed
mysql> select * from message;
+------+-----------+-----------+---------+
| id   | node_name | user_name | message |
+------+-----------+-----------+---------+
|    1 | one       | test      | testing |
+------+-----------+-----------+---------+
1 row in set (0.00 sec)

参考資料